Not that it’s much of a tutorial. I drew these instructions a couple of years ago, fully intending to post them…and then forgot. Or was distracted by other things. Not very hard to believe, if you know me! I was asked for more information about a ledger bind I previously posted, so here is what I know.
This is about as simple of a bind as you can get…it just looks complicated. The most difficult part is gluing it all together and keeping it aligned. This bind should be landscape, or wider than it is tall.
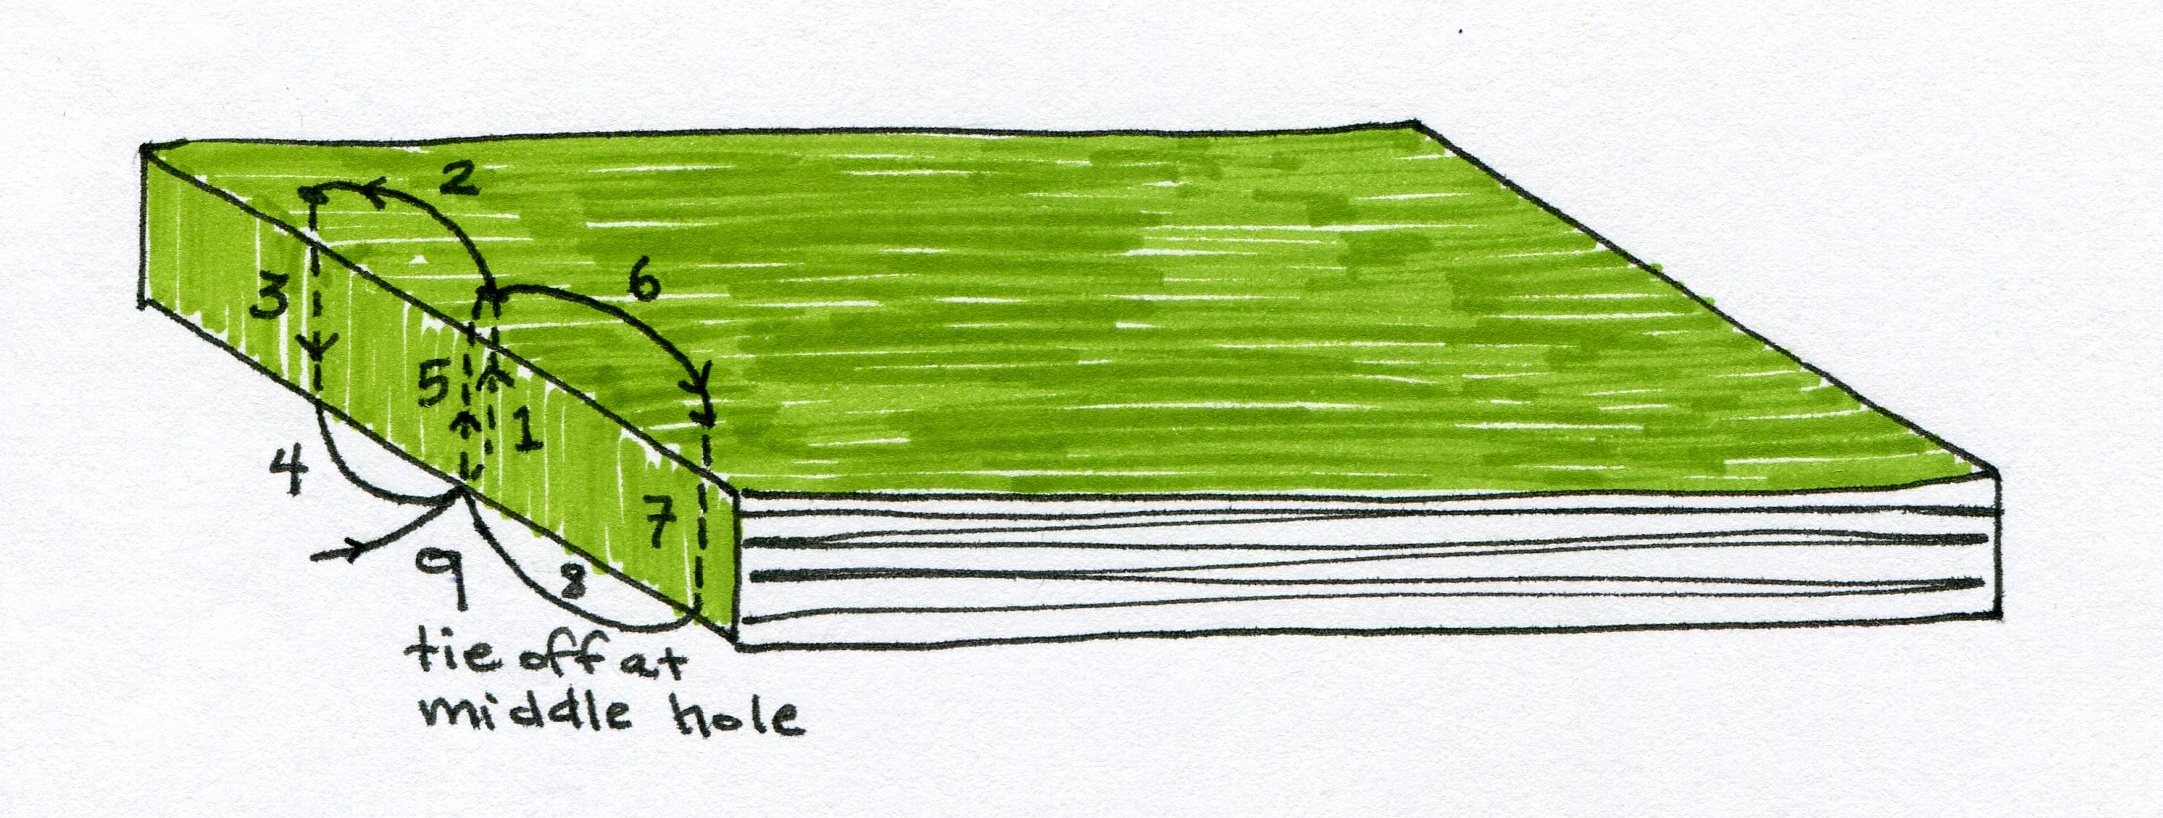
Start with a book block made of single sheets. You’ll need to drill three evenly spaced holes at least half an inch in from the spine edge, though ultimately where you place your holes depends on how wide your book is.
I generally cut a thicker piece of paper to wrap around the book block, like below. It isn’t necessary, but it makes the spine look much cleaner and if the paper of your book block is thin, the thicker paper is more durable.
Sew the block together by starting in the middle hole, and making a figure eight. Tie off. Cut the ends of your thread short, but they don’t have to be tucked in or hidden.
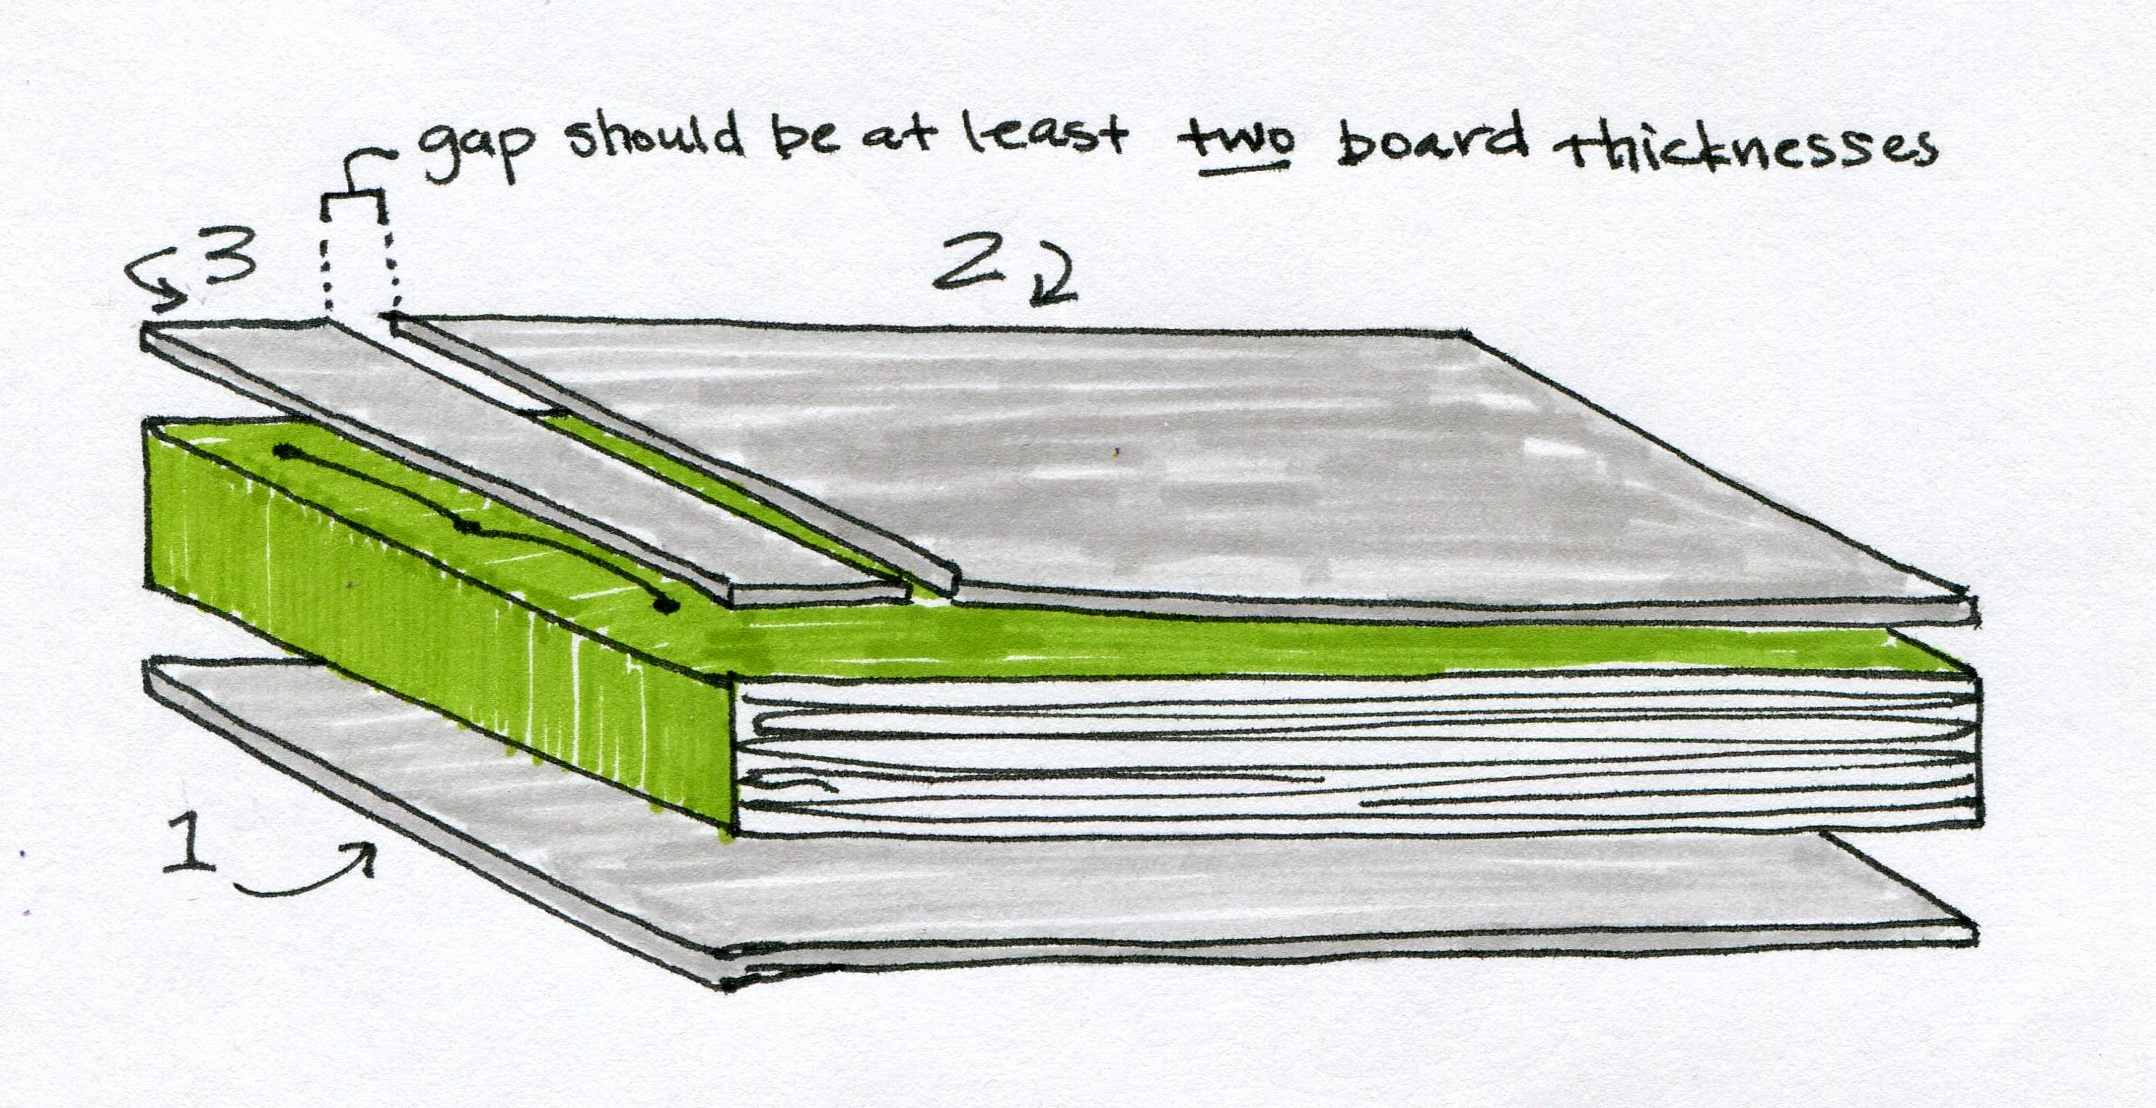
The boards for the front cover should leave a gap that is twice the thickness of the board. If you skimp on the gap, your book will not open all the way. Don’t go overboard with the gap though, because the section of the cover with board #2 will flop too much and be more likely to eventually rip off. Board #3 should be wide enough to cover the stitching.
Glue the boards to the book block. I generally glue them in the order they are numbered below.
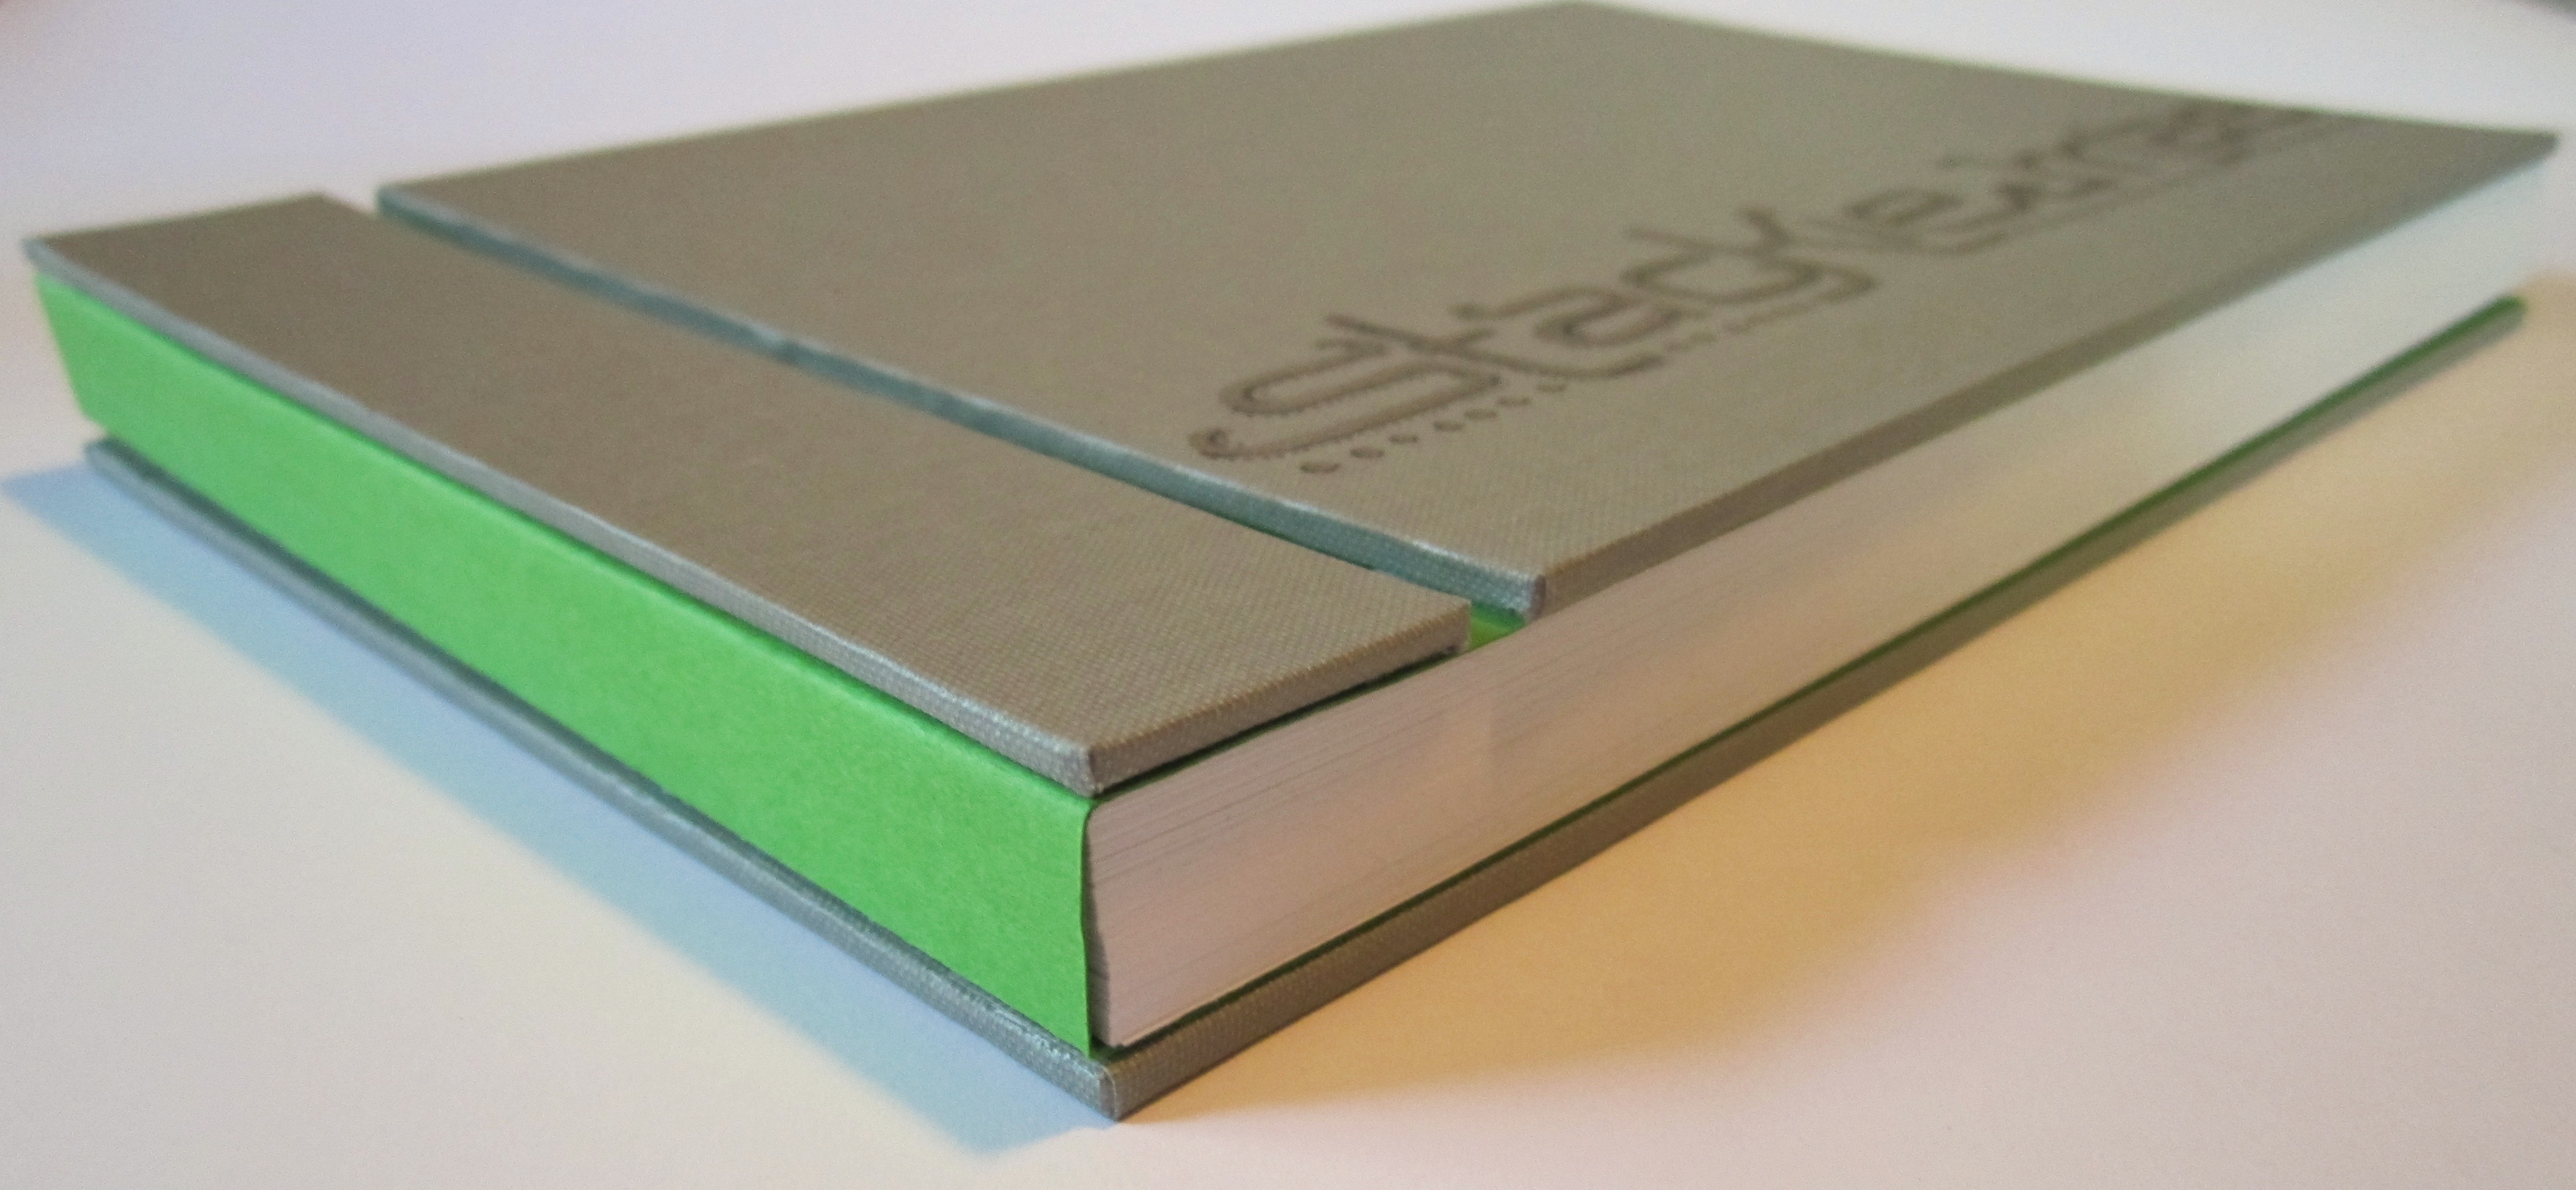
A look at the finished product:
A blank journal for a friend
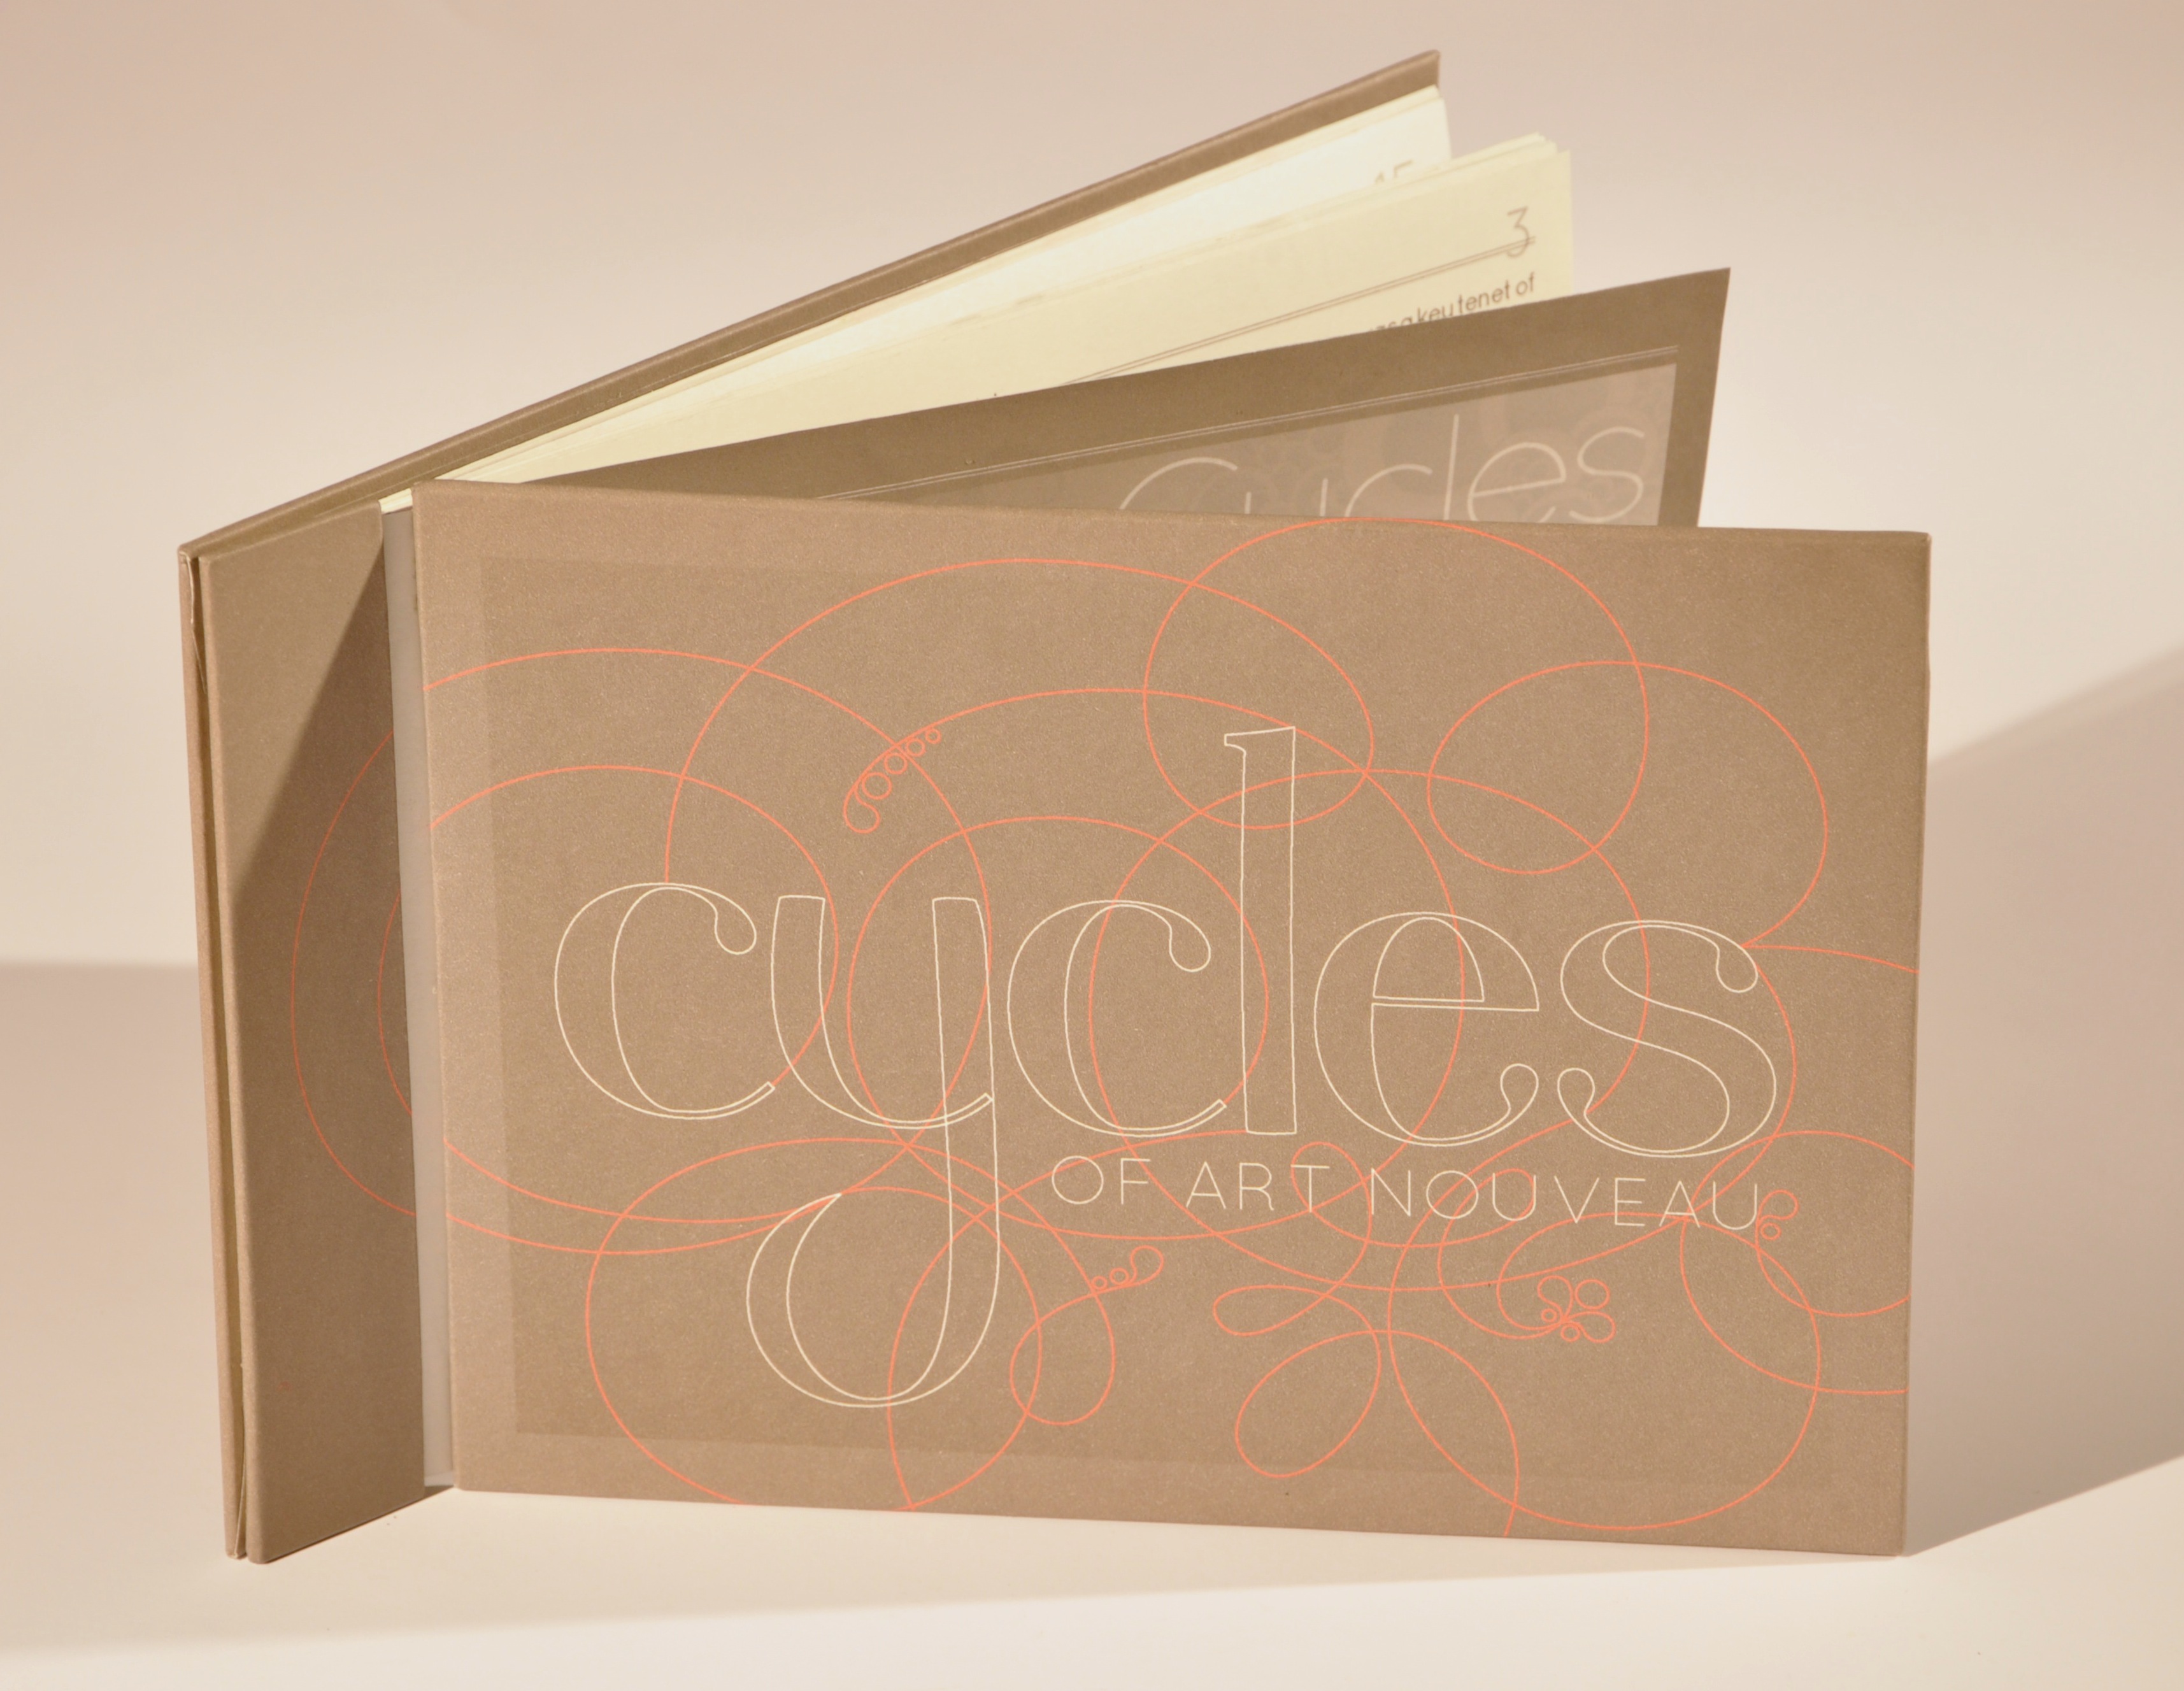
An art history paper for grad school. I had to make four copies of this book.
Hope that helps! If something doesn’t make sense, leave me a comment and I’ll try to clarify.
Thanks, this is great! Love your blog!
Yes, thanks for all your helpful information regarding books and bookbinding. There are so many options.
Thanks for sharing…I made binding too, greetings from Mexico http://colectivoagridulce.wordpress.com/
Reblogged this on lerusho.
Love your work Becca. But have I missed something? How are boards attached? Glue?
Hey Wendy! Yes, the boards are attached with glue. I mentioned the gluing as being the most difficult part, but I should probably add it to the instructions too.
just came across your blog looking for binding tips! Thaanks alot for your tutorials cant wwait to start experimenting with them – very creativee ones
Noella
Pingback: Japanese Bookbinding | Alice Bryony Jewellery
What is the thickness of the book board?
And did you cover the book board with paper?
Do you mind showing the other side of the cover (inside of the book) for a better look?
I would like to create this binding myself. :]
Hi June,
I looked through my photos, but unfortunately I don’t have a picture of the inside of either of my ledger binds. The green and gray one was a gift as well, so I don’t have it anymore.
The book board is one of the standard thicknesses, fairly sure that I used .087″ (3/32″). The gray book is covered with Italian book cloth, the ‘circles of art nouveau’ is covered with printed paper. And the insides are both paper: thick, cover-weight paper on the gray journal and the same printer paper that is on the outside for the other.
Hope that helps!
Becca
Pingback: 64: Paths, Walls, Books and more. | Almofate's Likes
Your site is beautiful and very informative. I am in love:) As a professional bookbinder I would recommend it to anyone who is interested in bookbinding. Please post more patterns for your incredible sewing.
Thanks, Ksenia! :)
Pingback: Japanese Binding – Menu designs | Matt Wyles Design
Pingback: japanese ledger binding: a tutorial | becca making faces | The Crafters Guild